Conrad Floor Model Press Micro-Gauge Manual
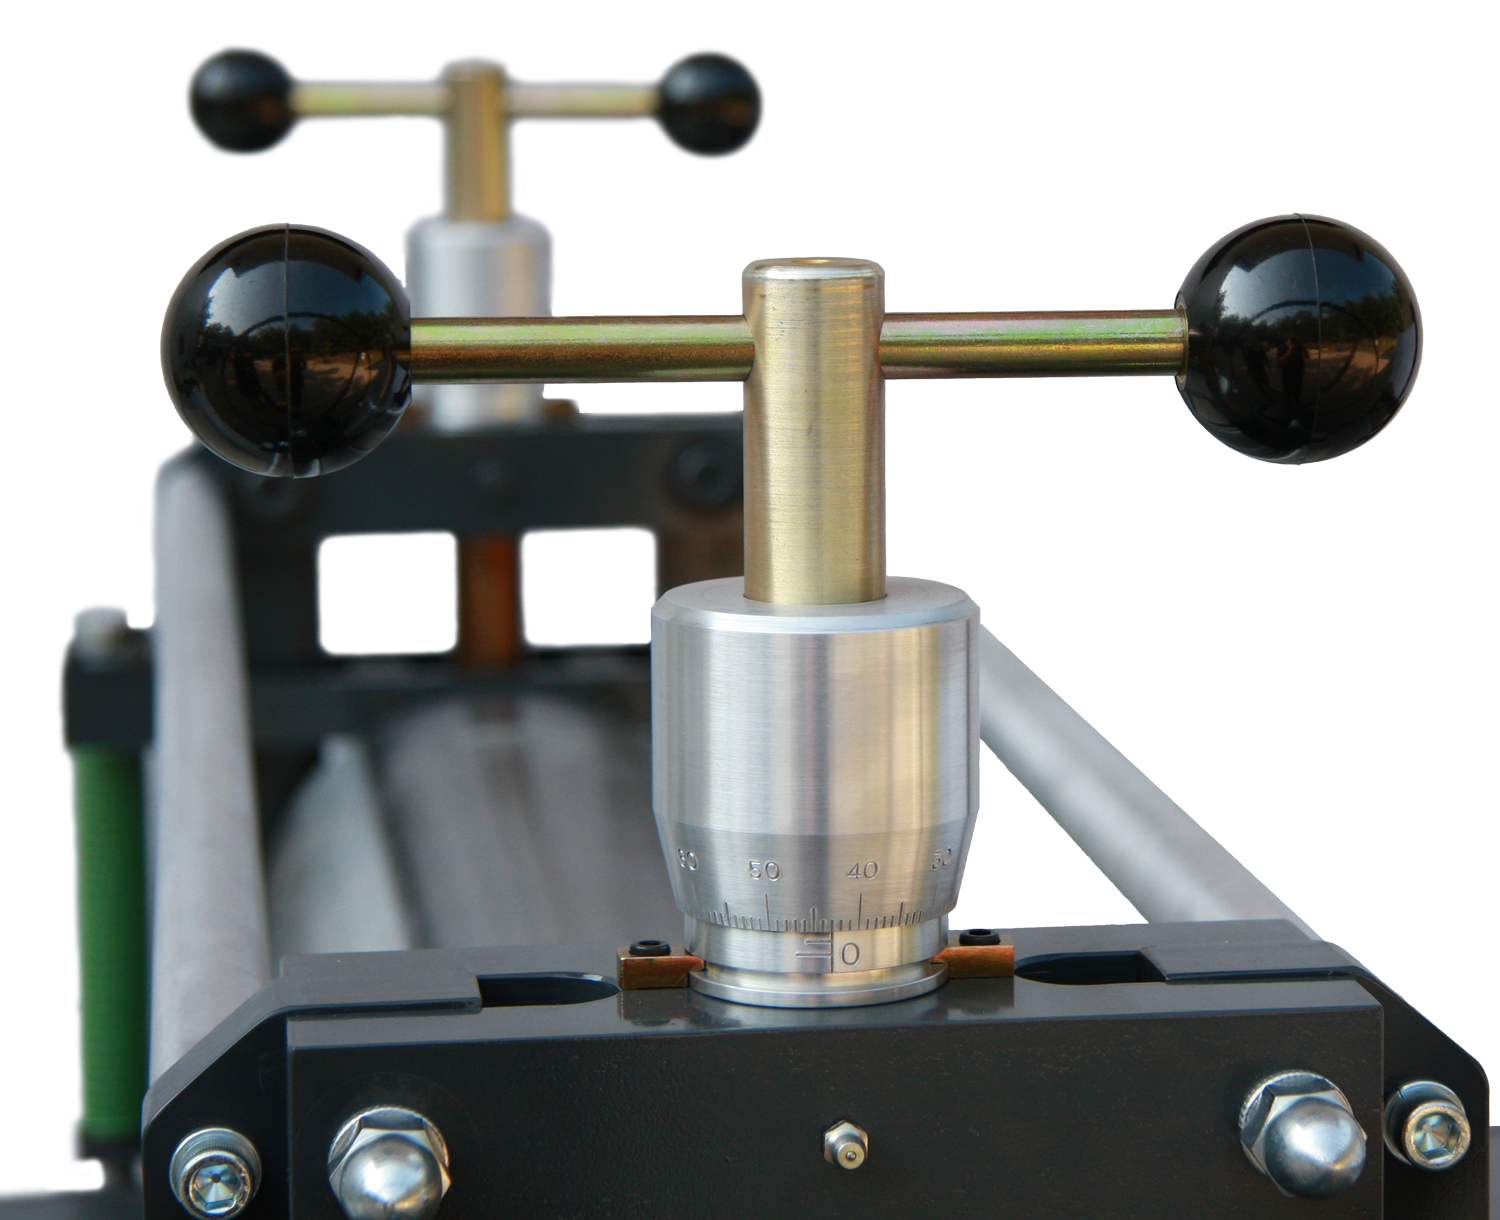
How to Calibrate your Conrad Floor Model Press Micro-gauges.
The Conrad Micro-gauge is custom designed to provide the most accurate printing pressure of any press today. Our micro-gauges are cut from solid aluminum to maintain accurate readings. The hand polished finish gives our micro-gauges a clean and elegant look. The Conrad micro-gauge is calibrated to .005 inches. That means you can evenly raise and lower the upper roll of your press about the width of human hair!
All Conrad Micro-gauges are set and calibrated on all Conrad presses before they leave our factory. We realize that many printmakers want to custom set their micro-gauges for different thickness bedplates and printing techniques. Below are instructions for setting the dials on Conrad Micro-gauges.
How to read your Conrad Micro-gauges
Easy to Read.
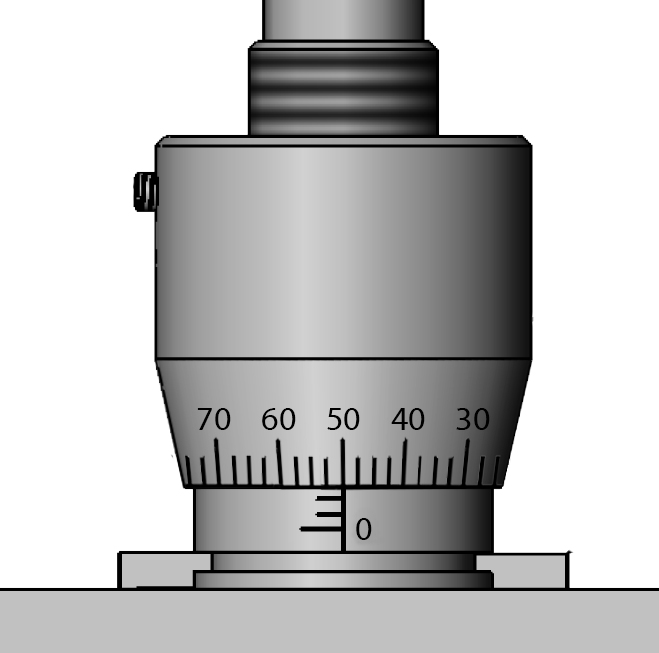
How to read your Conrad Micro-gauges
The Conrad Micro-gauge is the most accurate gauge available today. The easy to read dial makes printing with hairline accuracy effortless. Our micro-gauges are designed to measure the distance between the upper roller and the bedplate—your printing height. The dials on the micro-gauge barrel indicate the revolutions of the pressure screw. Each revolution of the pressure screw raises the upper roll .100 inches indicated by the dials on the micro-gauge thimble. To calculate the total measurement between the upper roll and the bedplate, multiply the number of lines showing on the micro-gauge barrel, not including the “0” line, by 100 and add that to the number on the micro-gauge thimble.
Assume two lines are showing on the micro-gauge barrel, not including the “0” line, and the micro-gauge thimble reads 50. This would indicate that your upper roll is .250 inches above your bedplate. In other words, your upper roll and the bedplate have a 1/4 inch space in between them.
How to set your Conrad Micro-gauges
First, bring the upper press roll into firm contact with the press bed.
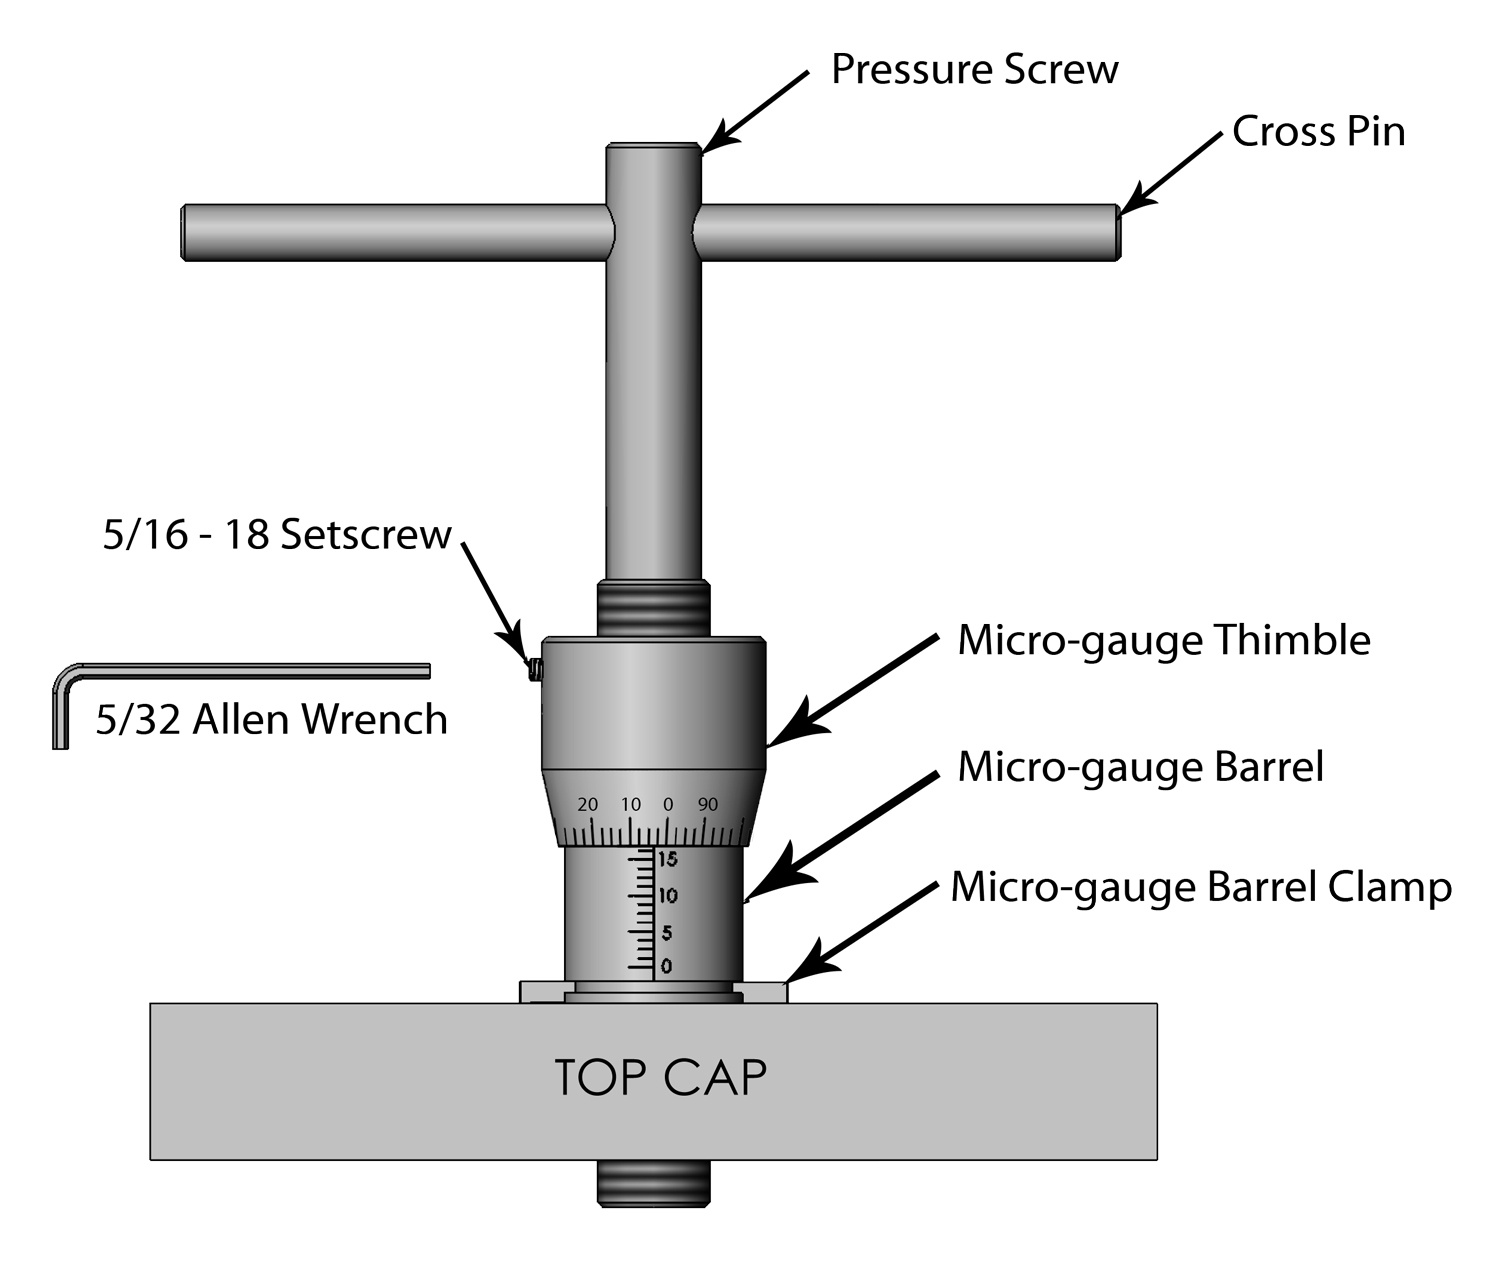
Second, loosen the setscrew in the micro-gauge thimble with the 5/32 allen wrench that came with your press.
Third, line the 0 line on the micro-gauge thimble up with the 0 line on the micro-gauge barrel. Also, slide the thimble up high enough on the barrel to slightly expose the first horizontal line on the barrel.
Tighten the setscrew on the micro-gauge thimble to lock the thimble in place.
Your Conrad Micro-gauge is set! You are ready to start printing with accuracy.
Press Accessories
Conrad Press Essentials.
Don’t forget about the press accessories.
We make tons of cool supplies and accessories that go hand in hand with your press.

Printmaking Felt Blankets
Shop Felt BlanketsRegistration Grid & Protective Bed Cover
Shop Felt Blankets

Printmaking Supplies
Explore all the printmaking supplies you need to fill out your studio.
